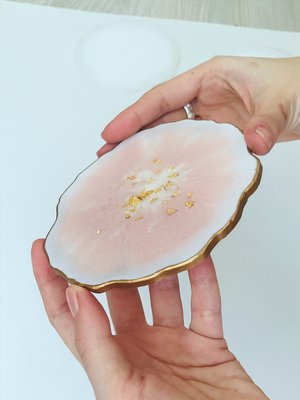
 Handmade items create a special atmosphere of comfort and a good mood at home. A wide scope for creativity is given by epoxy resin, which has recently become a popular material for art artists. The products obtained from it look unusual and interesting. For example, an indispensable attribute of any kitchen - coasters for mugs or glasses. Epoxy glass holders can be used for festive and daily table settings. They are well suited not only under glasses but also under glasses or cups, tea or coffee.
It is not necessary to have mega-abilities or take expensive courses to work with epoxy. For starters, you can try making simple products, such as coasters. With the help of a detailed step-by-step master class, epoxy cupholders are a snap to make.
We present you a video of the process of making a set of resin coasters at the hands of master Ksenia Kolodko. This set, or a reproduction of it, is available to order in our resin coasters catalog . You can study all the steps performed by the wizard in more detail in the article under the video.
What you need to work
You need to take care of the availability of all the necessary accessories in advance - buy in specialized stores or order online.
Epoxy resin
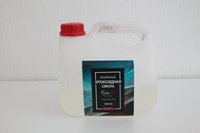 A bottle with epoxy resin It is better to choose a medium viscosity, for example, the Art Blong brand - it is universal, well suited for the first creative works. You need to buy a special resin for painting, it is resistant to ultraviolet rays, without a pronounced pungent odor.
Hardener
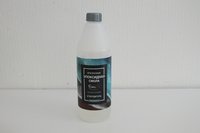 Bottled resin hardener The hardener is often sold in a kit with epoxy. If not, you can buy it separately. At home, it is recommended to use an ammine solution; when it is added to the epoxy, it solidifies at room temperature.
Silicone mold for resin or soap
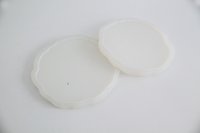 Molds (silicone molds for coasters) Molds can be bought ready-made or made by yourself from improvised materials - from silicone sealant or plastic waste. The ideal mold material is silicone. The walls of the silicone molds are smooth, the products are easily removed from the mold, they only need minimal grinding.
Gas-burner
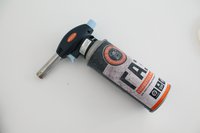 Gas burner to remove bubbles from trays A burner will be required to neutralize bubbles on the epoxy pouring surface. If you don't want to buy a special burner, you can use a jet flame lighter.
Dyes for resin
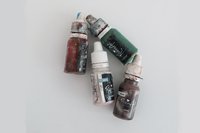 Several vials of dyes for resin Colors (or one-color) you can choose any that you like. See to it that they blend in with the interior of the kitchen, teacups, or glasses. The universal white color looks gentle and beautiful.
Fillers
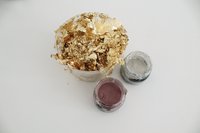 Fillers for resin coasters You can use mother-of-pearl, glitter, gold, or silver leaf as fillers - whatever your imagination tells you. Dried plants, flowers, or small petals look unusual in stands.
Libra
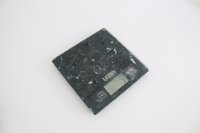 Kitchen Scale The finer the ratio of epoxy to hardener, the better the final result, so it is best to use an electronic kitchen scale with a flat surface. Do not forget to pre-hang the container.
Cups
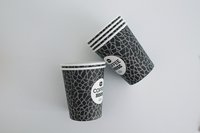 Disposable Resin Mixing Cups Regular plastic cups are required to mix epoxy. Lifehack: If you don't want to use plastic, you can cut the cups out of silicone muffin baking tins. But they are not that deep, so you need to be very careful.
Wooden sticks
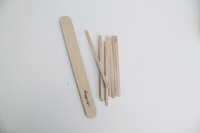 Wooden sticks for mixing epoxy resin It is convenient to mix epoxy resin with a solvent using special wooden spatulas. Usually sold in sets of 5 or more, the optimal length is 14 cm.
Individual protection means
Epoxy resin is a synthetic substance that forms strong polymers under the action of hardeners. On the Internet, you can find opinions that products made from it are hazardous to health.
 Respiratory protection mask, In fact, the hardened substance does not emit absolutely any toxic substances that can harm the human body. But before hardening, in the course of chemical reactions, unsafe formaldehyde and phenols are released. Therefore, when working with epoxy, it is imperative to wear a respirator mask and gloves to protect yourself from possible exposure to toxins.
 Gloves to protect hands from toxins when working with resin Conventional medical masks are not suitable for working with epoxy resin. The respirator has a filter, it traps harmful substances and allows purified air to pass through. Better to use a half mask that covers your mouth and nose. Remember to keep an eye on filter changes if you work with epoxy regularly.
End paint
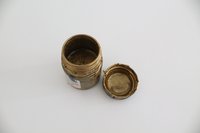 Paint for painting the ends of the stands The ends can be decorated with acrylic paint, a special aerosol or liquid leaf. You need to choose dry pigments, not water-based. You can also paint over the edges with a gold or silver marker.
Brushes
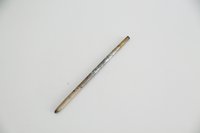 A brush for painting the ends of the cup holders A brush is required to paint the ends with paint. It is better to choose nylon, they are more elastic and do not leave fibers. Use a silicone brush to work with epoxy. It may be required to correct fill errors.
Grinding tool
 An engraver for grinding the ends of the stands To grind and polish the finished epoxy cup holder, you need one of the grinding tools: sanding paper/sponge or an engraver. Grinding gives the product a finished look, eliminates imperfections.
Expenses
Let's calculate the costs:
- epoxy resin + hardener - 10-30$, depending on the brand;
- silicone molds - 4-9$;
- gas burner - 6-11$;
- scales - 7-14$;
- dyes for resin - 5-7$;
- potal - 1 sheet 1.5-2,1$;
- wooden spatulas - 0.7$;
- respirator - 1-2$;
- paint for the ends - 2-5$;
- abrasive sponge - 1-2$.
It turns out that the minimum cost for making a standing start at 38$. If you have a kitchen scale at home and use a lighter instead of a burner - from 24$. Most of the purchased accessories will come in handy for later work if you plan to do epoxy art further.
You can save even more and buy epoxy resin cupholders from our website. The author's stand with a unique design will cost less.
Making cup holders: step by step instructions
We figured out the accessories and costs for work, now in detail about how to make an epoxy stand at home.
Step 1. Preparing the workplace
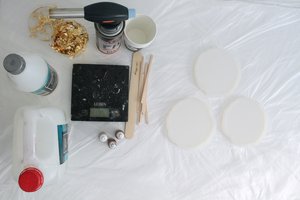 Prepared workspace for making stands with all working tools Epoxy requires a flat surface. It is better to select a separate table that can be covered with foil or paper. Arrange the silicone molds for pouring, prepare the rest of the necessary accessories. You need to work in a respirator and gloves, preferably in clothes with long sleeves.
Step 2. Preparation of the material
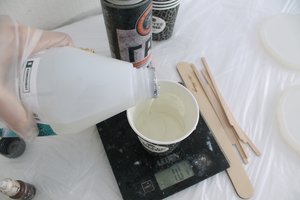 Weighing the resin on a kitchen scale Mix the resin with a hardener in a 2: 1 ratio - 80 and 40 g, respectively (or according to the instructions on the packaging of your epoxy). Stir until a smooth, homogeneous mass is obtained. Depending on how many colors you will be using, pour the epoxy into several cups and add the dyes. Leave one part transparent.
Step 3. Fill in the resin and fillers
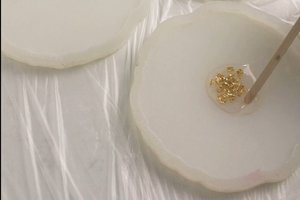 Adding Fillers to the Center of the Mold In the center of the silicone mold, place the fillers - broken pieces of sheet metal, dried flowers, glitter. Fill the pile with clear epoxy in a thin stream. Pour carefully to prevent the solution from spreading over the entire mold and completely cover the filler particles.
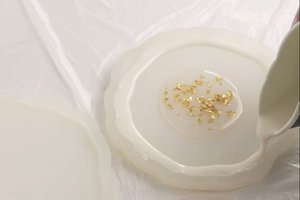 Pouring with white epoxy Now, in a circle, gently pour colored epoxy, eg white, into the rest of the mold. If small air bubbles form on the surface, remove them with a burner. It is not necessary to warm up for a long time so that the resin does not turn yellow. The pattern of streaks on the stand can be formed using a silicone brush or a regular toothpick.
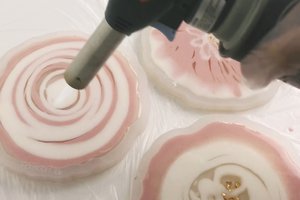 Firing epoxy resin with a gas burner At the end of the process, pour the remains of a transparent resin solution into the center. When bubbles appear, extinguish them with a burner again.
Step 4. Dry the resin
 We dry the coasters within 24 hours. It takes about a day for the epoxy resin to harden. It is better to cover the work for this time so that no dust particles get in. You can use cardboard boxes, cake lids, and other suitable products for this purpose.
Step 5. Grinding the ends
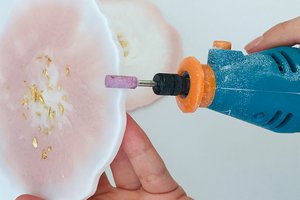 Grinding the ends of the coasters with a grower After 24-30 hours, almost finished cup holders can be taken out. We carefully remove them from the forms. The edges must be sanded carefully to prepare them for painting.
Step 6. Painting the ends
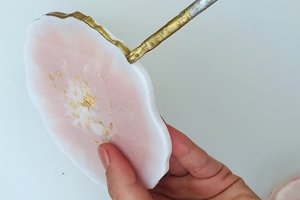 Painting the ends of resin cup holders with a brush The final touch remains - carefully cover the edges with acrylic paint or liquid gold leaf. Place the stand on a plastic cup to allow the paint to dry. So the painted ends will not touch for anything.
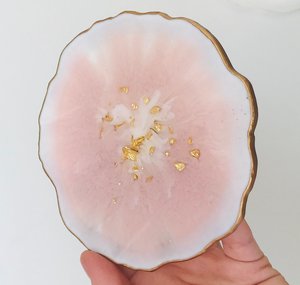 The result is a do-it-yourself resin stand That's all - you can admire the work done!
Benefits of using epoxy in such products
Among all polymers, epoxy resin has firmly taken the leading position and has become a favorite material for creativity. There is every reason for this:
- affordable price;
- simplicity in working with epoxy - even for beginners;
- safety of finished products;
- strength and sufficient heat resistance (withstands up to 60 degrees Celsius);
- low moisture permeability;
- obtaining unique drawings.
With proper care, epoxy products can be used for a long time.
Care Tips for Epoxy Cup Holders
Epoxy resin products are durable and resistant. However, do not put hot dishes on them. If you plan to use the coasters just for hot, you need to additionally cover them with thermal protection. To clean the surface, do not use abrasive powders or solvents, including alcohol or acetone.
To prolong the life of your epoxy cup holders, wipe them gently with a soft flannel cloth, maybe slightly damp, and then wipe dry to avoid stains and streaks.
Conclusions
Epoxy is a great creative material that many artists use and can be easily learned by beginners. Try to start with epoxy resin coasters, the master class details all the steps to make them. Such cup holders will last a long time and will become a highlight of your kitchen.